
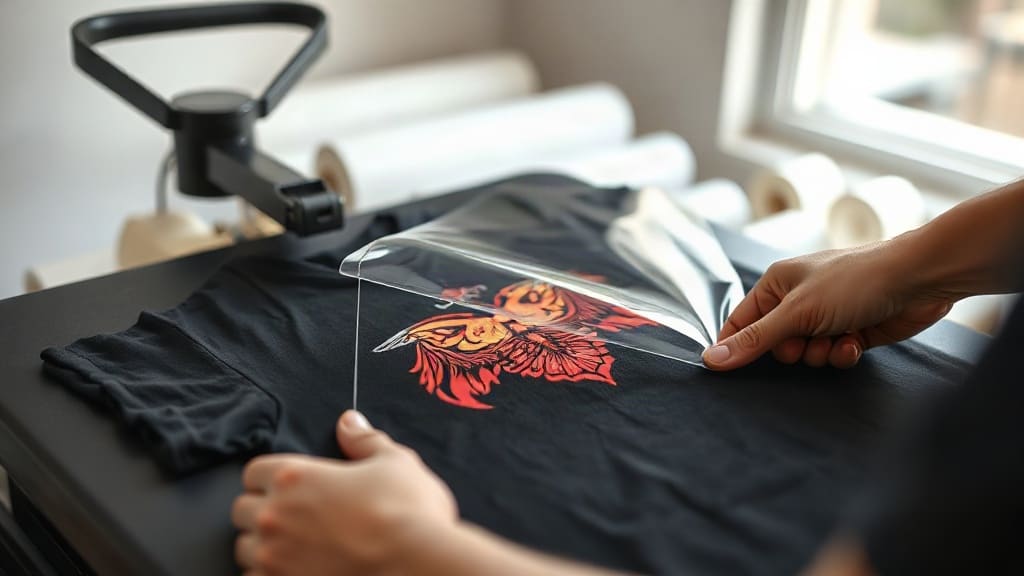
If you have ever tried to print a full-color design on a dark cotton t-shirt at home, you know the struggle. Vinyl peeling, ink bleeding, or a stiff plastic patch that cracks after two washes. That is exactly the problem DTF transfers solve. Direct-to-film printing has quietly become the go-to method for crafters, small business owners, and even large apparel brands who want photographic detail without the hassle of screens or special papers. In this guide, I will walk you through what DTF transfers are, how they compare to other methods, and exactly how to apply them so your prints stay soft and bright wash after wash.
What Are DTF Transfers?
DTF stands for Direct-to-Film. The process starts with a special PET film coated with a release layer. A printer deposits tiny droplets of water-based pigment ink onto that film, creating your design in reverse. While the ink is still wet, a fine layer of hot-melt adhesive powder is sprinkled over it. After shaking off the excess, the film goes through a curing oven or heat press to melt the powder into a flexible glue. The result is a thin, stretchy transfer that can be stored for months and applied to almost any fabric.
Unlike heat transfer vinyl (HTV), which requires you to cut and weed each color separately, DTF transfers come pre-printed with all colors and gradients intact. Unlike screen printing, you do not need a different screen for every shade. That makes DTF ideal for complex artwork, photographs, and small runs where setting up screens would be too expensive.
Why DTF Transfers Stand Out from Other Printing Methods
When I first switched from vinyl to DTF for my own shop, the difference was night and day. Here is why DTF has become my default choice for most jobs.
- No color limits. You can print millions of colors, subtle gradients, and fine details without extra cost.
- Works on almost any fabric. Cotton, polyester, blends, canvas, denim, even leather and nylon. No need for special coated shirts.
- Soft hand feel. A properly applied DTF transfer is thin and flexible. It moves with the fabric instead of sitting on top like a plastic sheet.
- Durability. With correct application, DTF prints survive 50+ washes without fading or cracking.
- Low minimums. You can order one transfer or one thousand. Perfect for personalized gifts and small businesses.
Of course, DTF is not the answer to every scenario. For very large orders of simple one-color designs, screen printing is still cheaper per piece. For stretchy activewear with high elastane content, you might need a specialty transfer. But for the vast majority of custom apparel projects, DTF hits the sweet spot of quality, versatility, and cost.
How to Apply DTF Transfers: Step-by-Step
Applying a DTF transfer is straightforward, but small details make a big difference in how long the print lasts. Follow these steps for a professional result every time.
1. Gather Your Tools
You will need a heat press (or a home iron with no steam), a lint roller or lint-free cloth, and a protective sheet like parchment paper or Teflon. A infrared thermometer helps you verify the press temperature, but many presses have accurate readouts.
2. Prepare the Garment
Pre-press the shirt for 5 to 10 seconds to remove moisture and wrinkles. Moisture is the enemy of DTF adhesion. Let the garment cool completely before placing the transfer. A quick pass with a lint roller ensures no fibers stick to the adhesive.
3. Position the Transfer
Place the DTF transfer with the printed side facing up (the adhesive side is against the fabric). If you are unsure which side is which, the dull side is the adhesive; the glossy side is the carrier film. Center your design and secure it with heat-resistant tape if it tends to shift.
4. Press with Medium Pressure
Set your heat press to 300°F to 325°F (150°C to 160°C). Press for 10 to 15 seconds with medium pressure. Too little pressure and the adhesive will not penetrate the fabric weave; too much and the design can spread or lose detail.
5. Peel the Carrier Film
DTF transfers are typically cold peel. Wait 30 to 60 seconds until the film is cool to the touch, then slowly peel it away. If any part of the design lifts with the film, press again for 5 seconds and try peeling once more. Hot peeling can cause the ink to stretch or smear.
6. Post-Press for Extra Durability
Cover the design with parchment paper and press again for 5 to 10 seconds. This second press fully activates the adhesive and smooths the print. It is an optional step, but I never skip it for items that will be washed frequently.
Common Mistakes and How to Avoid Them
Even experienced crafters run into trouble with DTF transfers. Here are the most common issues and their fixes.
- Print peels after washing. Usually caused by insufficient pressure or too low temperature. Increase pressure and verify your press temperature with an infrared gun.
- Design looks dull or cloudy. The adhesive powder may not have been cured properly before you received the transfer, or you pressed at too low a temperature. Try a slightly higher temperature and ensure even pressure.
- Cracks in the print. Stretching the garment while the print is hot, or washing in hot water. Always cold peel and wash inside out in cold water.
- Adhesive residue on the film. This happens when the transfer is under-cured. If you make your own DTF transfers, increase the powder curing time. If you buy them, contact your supplier.
Fabric Compatibility: What Works Best
One of the biggest advantages of DTF transfers is their wide fabric range. Here is a quick breakdown.
- 100% Cotton: Excellent. The adhesive bonds firmly, and the print stays soft.
- Cotton/Poly Blends: Excellent. Works well as long as the poly content is not extremely high.
- 100% Polyester: Good, but use a lower temperature (around 280°F) to avoid dye migration. Some polyesters may require a low-bleed DTF film.
- Nylon and Leather: Possible, but test first. These materials can be heat-sensitive.
- Canvas and Denim: Great for totes and jackets. The textured surface actually helps the adhesive grip.
DTF vs. Other Transfer Methods: A Quick Comparison
How does DTF stack up against the alternatives?
- DTF vs. HTV: DTF wins for multi-color and photographic designs. HTV is better for simple one-color lettering and numbers.
- DTF vs. Screen Printing: Screen printing is more economical for large runs of simple designs. DTF is better for detailed art and small batches.
- DTF vs. DTG: DTG (direct-to-garment) prints directly onto the shirt, so it only works well on 100% cotton. DTF works on more fabrics and often has better durability on blends.
- DTF vs. Sublimation: Sublimation only works on light-colored polyester. DTF works on dark colors and cotton.
Frequently Asked Questions About DTF Transfers
How long do DTF transfers last?
With proper application and care, a DTF transfer can last as long as the garment itself. Expect 50 or more washes without significant fading, cracking, or peeling. Washing inside out in cold water and avoiding high heat in the dryer will extend the life further.
Can I apply DTF transfers with a home iron?
Yes, but it is trickier. You need a consistent temperature around 300°F and firm pressure. A home iron often has hot spots and may not provide even pressure. If you plan to do more than a few shirts, invest in a heat press. It pays for itself quickly.
Do DTF transfers work on dark colors?
Absolutely. Unlike sublimation, DTF transfers include a white ink layer that makes colors pop on dark fabrics. You do not need to change your design or use a special light-colored shirt.
What is the best way to store unused DTF transfers?
Keep them in a cool, dry place away from direct sunlight. A zip-top bag or a plastic sleeve works well. Avoid folding the transfers sharply, as that can crack the adhesive. Stored properly, they remain usable for 6 to 12 months.
Can I stretch a garment with a DTF transfer?
DTF transfers have some stretch, but they are not infinitely elastic. For high-stretch fabrics like spandex or elastane blends, the print may crack if stretched beyond its limit. For everyday t-shirts and hoodies, the stretch is more than enough.
DTF transfers have opened up a world of possibilities for custom apparel. Whether you are making a single gift or launching a clothing line, this technology gives you professional results without the steep learning curve of screen printing or the limitations of vinyl. If you are ready to try DTF transfers for your next project, start with a small test batch and see the difference for yourself.